|
A* Pathfinding Project
3.6
The A* Pathfinding Project for Unity 3D
|
|
A* Pathfinding Project
3.6
The A* Pathfinding Project for Unity 3D
|
Getting Started with the A* Pathfinding Project - Part 2 - Navmeshes.
The first part of this tutorial covers normal navmesh graphs, i.e those modelled by hand. The second part covers recast graphs which automatically generate navmeshes for you.
Even if you are only interested in the recast graphs, please read the first section as well since it covers some things which apply to recast graphs as well.
In the first part of this tutorial we used the Grid Graph. But the A* Pathfinding Project has support for more than one type of graphs, it also supports navmesh graphs.
A GridGraph consists of a bunch of nodes arranged in a grid-like pattern, it is very structured and thus works for most things you throw at it. But doesn't it feel like a waste of nodes to generate a huge number of nodes for your large open grass field you are using in your game, just to be able to get enough precision to represent the small obstacles around the farmers house (or whatever). Wouldn't it be better to use a few nodes to represent the large field and then more nodes for the smaller obstacles. This is where navmeshes come in. Navmeshes represent the world using polygons (more specifically triangles in this case), much like other meshes you have in your game. Navmeshes are used to accurately describe the surface that the character(s) can walk on.
Like you see in the above image, the navmesh does not have equally sized nodes, but nodes can be as large or as small as you want them to be. The end result is that navmeshes can more accurately describe the environment and are smaller because they do not need to waste a large number of nodes on empty areas. Because they are smaller, they are also usually faster to perform pathfinding on. Also, they can represent multilayered environments as opposed to normal grid graphs (but which is a feature of the LayeredGridGraph available in the pro version).
So what are the downsides? The main problem with navmesh graphs is that they take a long time to generate (or model, if you do it by hand). To scan a whole GridGraph as in the GridGraph example scene takes something like 100-200 ms (depending on the computer), to generate a recast graph (back to them later) easily takes a few seconds. They are also relatively static: when you have generated it, it is quite slow to update it, even just a very small part of the graph. With the RecastGraph, it is possible to do limited fast updating of the graphs using navmesh cutting , and full graph updates in small parts of the graph (relatively slow).
Navmeshes can be modelled by hand, or automatically generated. The automatic generation is only available in the pro version and is described later in this tutorial.
Assume we had this scene: A simple plane with a box in the middle.
To model a navmesh, open up you favourite modelling application (I will use Blender).
Create a plane, subdivide it two times and then remove the inner four quads.
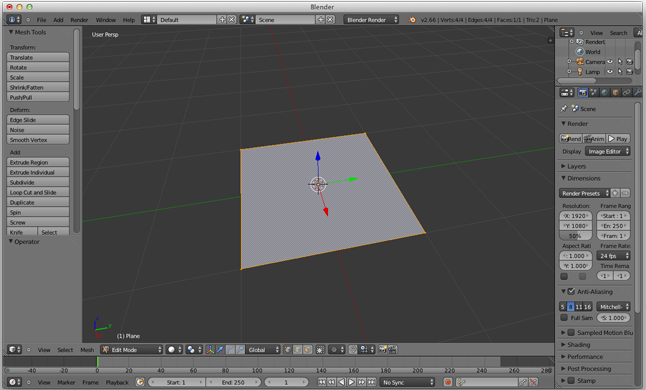
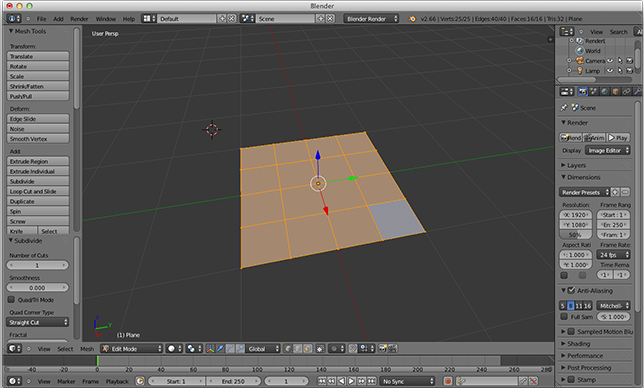
Blender will show quads, but when exporting to Unity, it will be converted into the triangles that the A* Pathfinding uses.
Export to an FBX file somewhere in your project.
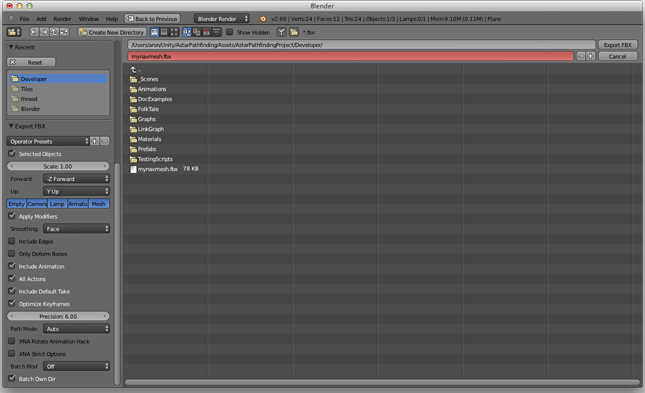
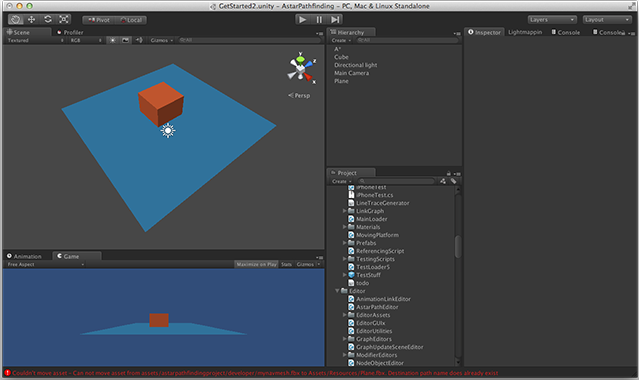
Now it should show up in Unity.
Create a new GameObject, like in the first tutorial, name it "A*" (to find it easily in the heirarchy) and attach the "Pathfinder" component. Then open Graphs -> Add Graph -> Navmesh Graph. This will create a new navmesh graph, open the settings for it.
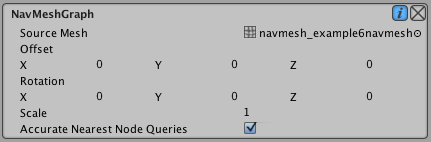
Drag the mesh object (not the prefab object) which was imported before to the "Source" field on the navmesh graph. It will probably show some fix buttons. Due to technical serialization issues, the meshes need to be placed in the Resources folder and the object must be named the same as the actual mesh. Clicking the fix buttons will do this for you.
Press Scan (or Cmd-Alt-S). If everything goes well, you will see the mesh in the scene view. However you might need to change the import scale on the mesh (in the import settings for the mesh asset), usually Unity defaults to an import scale of 0.01, change this to 1. Also depending on the axis settings your modelling tool uses, you might need to rotate it. You can rotate it directly in the navmesh graph settings. When importing from blender with default settings, rotating with (-90, 0, 0) will give it the correct rotation.
Now pressing scan should show you the graph in the scene view. Make sure Show Graphs (at the bottom of the inspector, is checked).
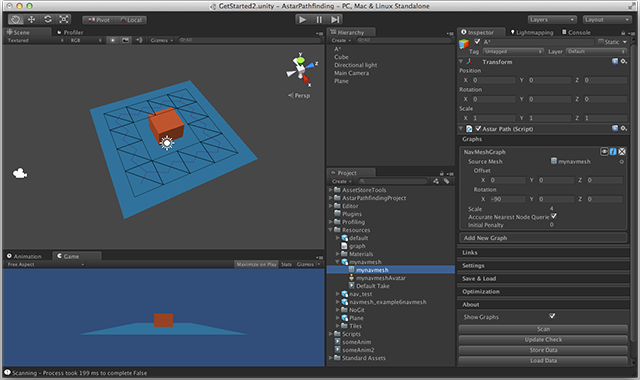
In the previous tutorial we wrote a simple script for moving a character around. We could use the same script, but to get nicer movement I will introduce an included component which gives very nice movement on navmeshes (specifically navmeshes). It is called RichAI. Create a new GameObject and attach the RichAI component to it. It will automatically attach a Seeker. For visualization purposes, add a Capsule object as a child object to root. Move the capsule one unit up, so that the root GameObject will have its pivot point at the capsule's base, the RichAI script assumes that the pivot is at the feet of the character.
Take care that you remove the capsule collider (and any other colliders) from the character. Or you need to configure the mask field on the RichAI component to exclude those colliders. Why? Because the RichAI component by default uses raycasting to determine where the ground is, and if that raycast hit a collider which was attached to itself, you would see wodd behaviour (try for yourself). It also support a CharacterController, but I do not recommend that because character controllers are relatively slow.
Create another GameObject named "Target". Assign that object to the Target field on the RichAI component. Also enable continous Path Recalculation on the RichAI, otherwise it will just wait for a move order, but there is no other script telling it to move.
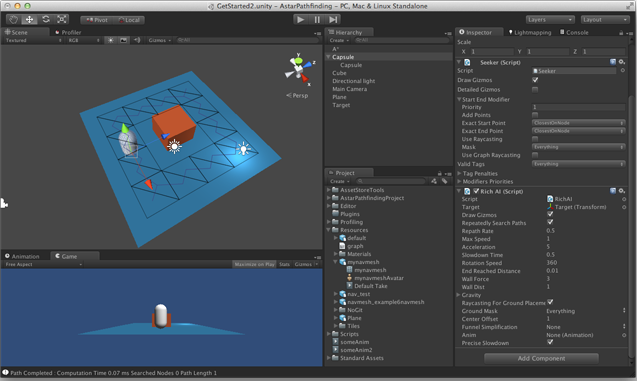
Now when pressing play you should see the agent moving towards the target. When moving the target object around, the agent should follow it.
The RichAI script is specially written for movement on navmesh graphs. It enforces that the agent stays on the navmesh at all times. As opposed to other movement scripts in this project, it does not have support for path modifiers. This is because it does not follow a list of waypoints, instead it follows a list of nodes. This has the advantage that the character can be pushed around by some amount and it will still move correctly without a path recalculation.
Describing every setting for the RichAI is too much for this tutorial, you can find documentation for it here: RichAI.
When not using the RichAI component, which has build in path simplification, it is recommended to attach the funnel modifier to the GameObject with the Seeker. The funnel modifier will simplify the path and make it much more aesthetically pleasing (and also shorter).
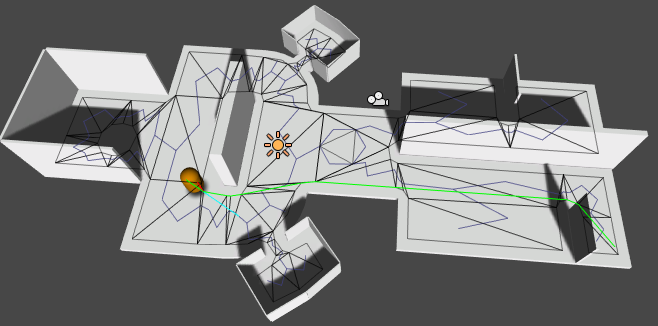
Navmesh graphs can sometimes give suboptimal paths. This is because pathfinding is carried out on node (triangle) centers. It happens mostly when the navmesh has very large and very small nodes (triangles) placed close to each other. The pathfinding then usually prefers the path with smaller triangles (sometimes the one with larger triangles, but not as common).
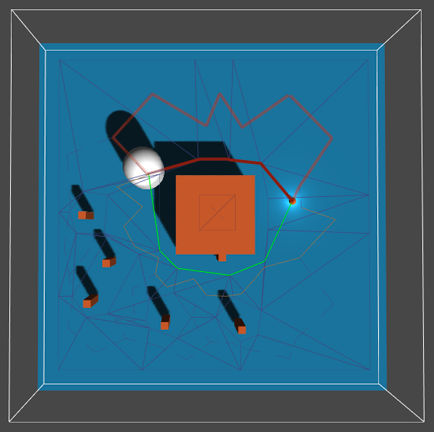
In the above image, the found path is shown in green, the nodes it passes through in pale orange. The actual shortest path is shown in red, with the nodes it passes through in pale red.
There is no silver bullet for this. Try to avoid very large triangles close to small ones. For recast graphs (see below), you can specify a lower tile size to split up very large triangles into smaller ones. And the Max Edge Length can be lowered as well.
A recast graph can automatically generate the navmesh, saving you many precious hours of work. You can remove the previously created navmesh graph and add a recast graph instead.
The recast graph works by taking all your meshes in your scene (that's the polygons, not the colliders, though that can be enabled as well) and voxelize it, a 2D analogue for voxelization would be like taking a bunch of triangles and drawing them on a texture, textures are made up of pixels, 3D pixels are called voxels. Then a walkable navmesh is generated from settings like character height, radius and similar.
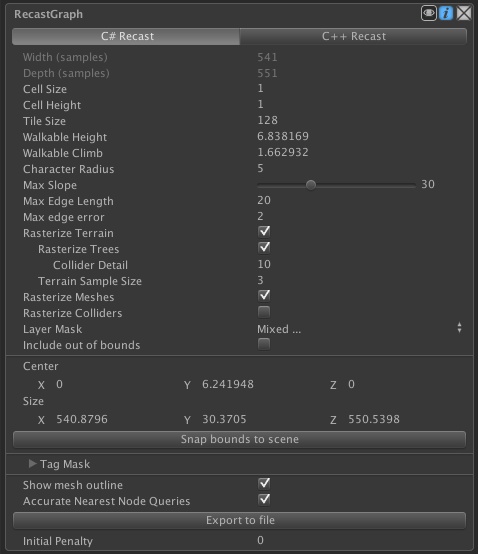
Scanning the graph directly will most likely not give you any good results. First, press the Snap Bounds To Scene button. It will find all meshes in your scene and configure the graph's bounds to enclose them. You can also specify the bounds manually. The bounds is visualized by a white wire-cube in the scene view.
The width and depth values will probably be too low. Those fields are not directly editable, instead you have to edit the cell size (size of each voxel) to modify it. For this scene, I have set cell size to 0.1, and since our plane is 10 units wide, and the graph encloses it precisely, the number of width and depth samples will be 100. You can also set cell height to a similar value. If that is too high, there will not be enough precision to represent small y-coordinate changes. Next, set tile size to 100. A recast graph uses tiles to divide the graph into square chunks. Setting it to the same as our width/depth gives us a single tile for the whole mesh. Usually you can do that and it will give you better navmeshes. But a lower tile size can be good when updating a recast graph (less to update) or to divide up huge polygons in a number of smaller ones to avoid suboptimal paths (more on that later).
Pressing scan now should give you something like this: (you can compare your settings to mine)
It is often nice to have Show Mesh Outline enabled in the recast graph settings.
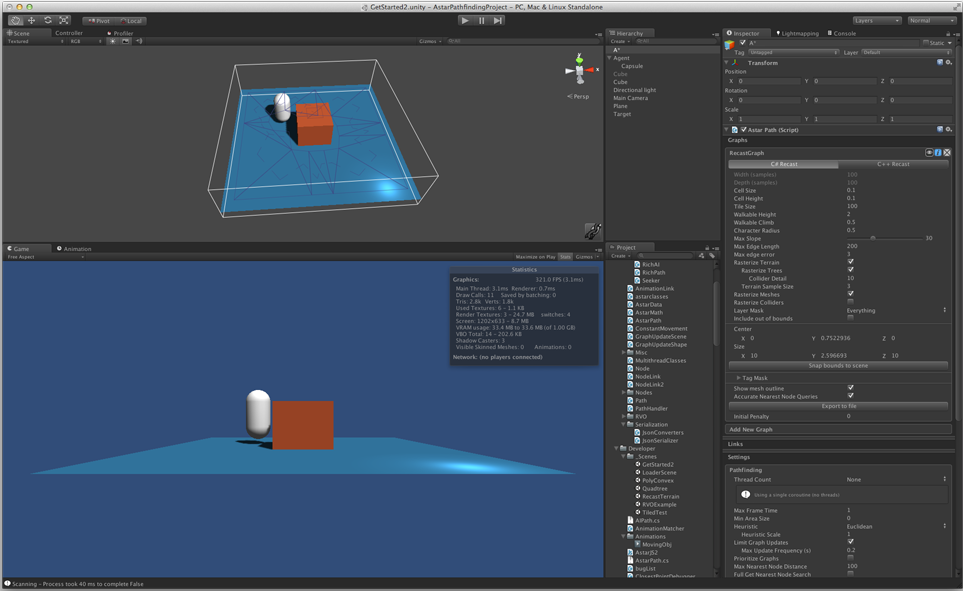
Almost everything looks good. The only problem is that our character has also been included in the navmesh, we don't want that (since the character will move around, it is not static). So we place the character in a separate layer (e.g Transparent FX) and then we configure the Layer Mask field on the recast graph to exclude that layer in navmesh generation.
Pressing play should now give you a scanned graph and the character should move to the target.
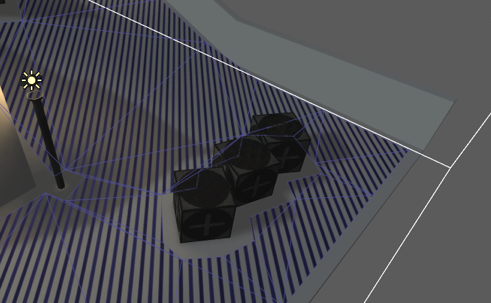
The resolution of the recast graph (the width/depth fields in the inspector) have a large effect on how the generated navmesh looks. The image below shows the same environment, but with different resolution for the voxelization. Note that the thin region between the cubes is only walkable when a high enough resolution was set.

Rasterization resolution has a great effect on the time it takes to generate a recast graph, but it has no direct impact on the runtime performance of it (except of course, full graph updates). Indirectly it can affect it slightly since a large resolution can add more detail to the graph.
 1.8.2
1.8.2 
