Get Started With ALINE
In this tutorial we will cover how to create a simple script and draw some things from the Update loop as well as in a gizmo callback.
Contents
Downloading
The first thing you need to do, if you haven't done so already, is to download the package.
You can download the package in the Asset Store or from the package website.
Drawing from the Update loop
If you want to debug what a script does, then drawing things from the code is a great way to do it.
Create a new C# script in Unity and name it GetStartedExample.cs, then open that up in a text editor and write the following code.
using UnityEngine;
// Important for the script to be able to find the Draw class
using Drawing;
public class GetStartedExample : MonoBehaviour {
void Update () {
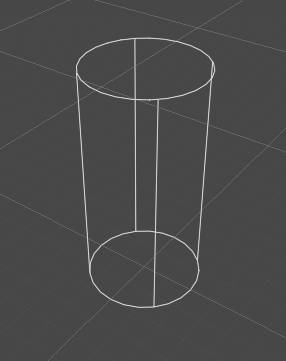
// Draw a cylinder at the object's position with a height of 2 and a radius of 0.5
Draw.WireCylinder(transform.position, Vector3.up, 2f, 0.5f);
}
}
In your Unity scene you can then create a new GameObject and attach the GetStartedExample script to it. If you press play you should see a cylinder rendered at the object's position.
You can draw other things than cylinders, of course. Take a look at the Drawing Commands page for a list of them.
If you want to render the cylinder in a different color, you can simply add a color parameter at the end. All drawing commands have an optional color parameter at the end.
Draw.WireCylinder(transform.position, Vector3.up, 2f, 0.5f, Color.red);
Scopes
A powerful abstraction used in this package is the notion of scopes. Scopes can be used to set the color, matrix, line width or duration of multiple drawing commands at once without having to individually specify them or having to do matrix multiplications manually. This is both faster and leads to more readable code.
// Draw three red cubes Using matrix scopes is very useful if you want to, for example, draw in local space relative to some object. In the example below, a cylinder is drawn in an object's local space. This means it is moved, rotated and scaled with the object automatically.
using (Draw.WithColor(Color.red)) {
Draw.WireBox(transform.position, Vector3.one);
Draw.WireBox(transform.position + Vector3.right, Vector3.one);
Draw.WireBox(transform.position - Vector3.right, Vector3.one);
}
using (Draw.InLocalSpace(transform)) {
    // Draw a box at (0,0,0) relative to the current object
    // This means it will show up at the object's position
    Draw.WireBox(Vector3.zero, Vector3.one);
}

// Equivalent code using the lower level WithMatrix scope
using (Draw.WithMatrix(transform.localToWorldMatrix)) {
    Draw.WireBox(Vector3.zero, Vector3.one);
}
In the example below the color and duration scopes are shown. // This box will be drawn for 2 seconds
using (Draw.WithDuration(2)) {
Draw.WireBox(Vector3.zero, Vector3.one);
}
// Scopes can be nested
using (Draw.WithColor(Color.red)) {
using (Draw.WithDuration(2)) {
Draw.WireBox(Vector3.zero, Vector3.one);
}
}
Drawing object gizmos
Drawing helper visualizations for objects in the scene view is often helpful when developing a game. With Unity's built-in gizmo system you draw everything in the OnDrawGizmos method and you need to use the Gizmos class instead of the Debug class. In this package, you do everything with the Draw class.
To receive gizmo callbacks, you need to make your script inherit from MonoBehaviourGizmos instead of from MonoBehaviour. You can then override the DrawGizmos method and draw your gizmos there exactly as you would in other parts of the code.
using UnityEngine;
using Drawing;

public class GetStartedGizmos : MonoBehaviourGizmos {
    public override void DrawGizmos () {
        using (Draw.InLocalSpace(transform)) {
            // Draw a cylinder at the object's position with a height of 2 and a radius of 0.5
            Draw.WireCylinder(Vector3.zero, Vector3.up, 2f, 0.5f);
        }
    }
}
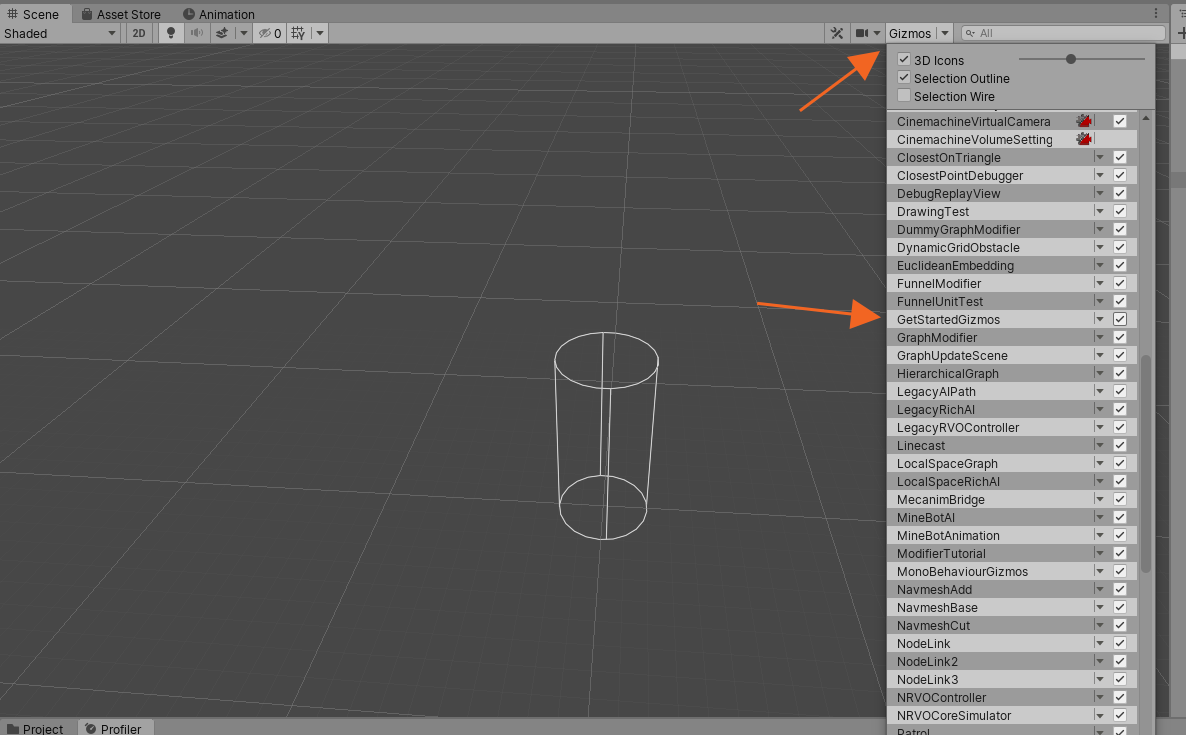
Gizmos will be drawn all the time, even when the game is not playing or if it is paused. You can toggle gizmo drawing for individual components in the gizmos menu in the top right corner of the scene view and game view.
Selection based drawing
If you have a lot of gizmos in a scene, it can sometimes cause quite a bit of clutter. One solution to this is to draw simple gizmos most of the time and only draw more elaborate or detailed gizmos when the object is selected.
This can easily be accomplished using the GizmoContext class.
public override void DrawGizmos () {
    using (Draw.InLocalSpace(transform)) {
        if (GizmoContext.InSelection(this)) {
            // Draw a yellow cylinder
            Draw.WireCylinder(Vector3.zero, Vector3.up, 2f, 0.5f, Color.yellow);
        } else {
            // Draw a yellow circle with some transparency
            Draw.xz.Circle(Vector3.zero, 0.5f, Color.yellow * new Color(1, 1, 1, 0.5f));
        }
    }
}
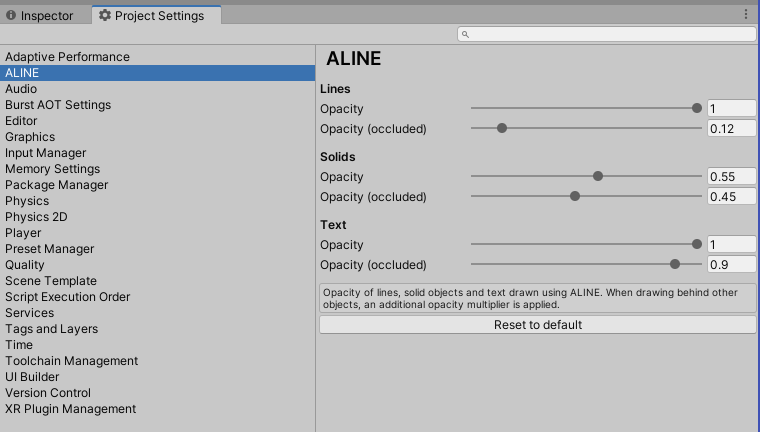
Project Settings
Sometimes it can be convenient to adjust the opacity of gizmos globally. This can be done in the project settings. Solid objects (e.g. Draw.SolidBox) are by default drawn slightly transparent. You can adjust this in the project settings if you wish.