Automatically generating a navmesh
This tutorial shows how you use a RecastGraph to automatically generate a navmesh for your game.
This tutorial is a part of Using navmeshes.
Note
The Recast Graph is only available in A* Pathfinding Project Pro (not to be confused with Unity Pro, it can be used in Unity Free as well).
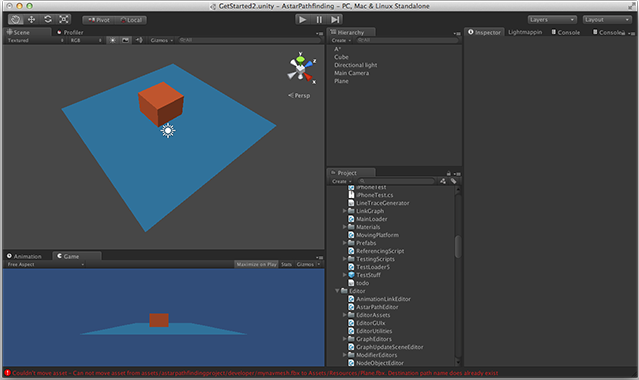
Assume we have this scene: A simple plane with a box in the middle.
A recast graph can automatically generate the navmesh, saving you many precious hours of work. You can remove the previously created navmesh graph (if you followed the Creating a navmesh manually tutorial) and add a recast graph instead.
The recast graph works by taking all your meshes in your scene (that's the polygons, not the colliders, though that can be enabled as well) and voxelizes it, a 2D analogue for voxelization would be like taking a bunch of triangles and drawing them on a texture, textures are made up of pixels, 3D pixels are called voxels. Then a walkable navmesh is generated from settings like character height, character radius and other similar settings.
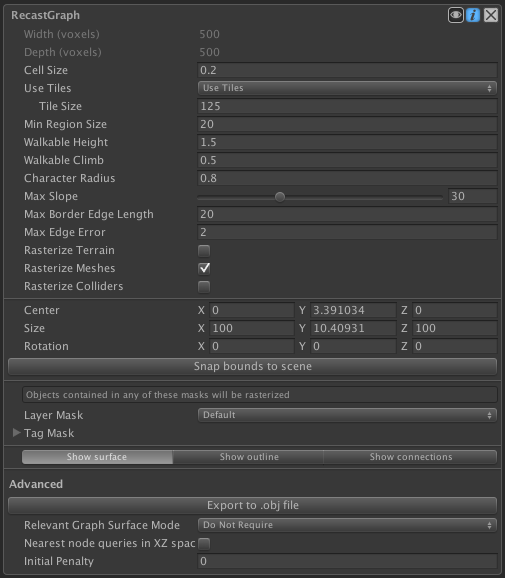
Scanning the graph directly will most likely not give you any good results. First, press the Snap Bounds To Scene button. It will find all meshes in your scene and configure the graph's bounds to enclose them. You can also specify the bounds manually. The bounds is visualized by a white wire-cube in the scene view.
The width and depth values will probably be too low. Those fields are not directly editable, instead you have to edit the cell size (size of each voxel) to modify it. For this scene, I have set cell size to 0.1, and since our plane is 10 units wide, and the graph encloses it precisely, the number of width and depth samples will be 100. Next, set tile size to 100. A recast graph uses tiles to divide the graph into square chunks. You can also disable tiles completely if you want by setting the 'Use Tiles' setting to 'Dont Use Tiles'. Having tiles is usually better however because of a few reasons:
It makes it possible to scan the different tiles in parallel which can make the scan a lot faster.
You can update individual tiles in a recast graph during runtime, which is faster than updating the whole graph.
navmesh cutting operates on a tile by tile basis and updating a smaller part of the graph is faster.
It breaks up very large polygons which reduces the risk of very suboptimal paths (more about this in Using navmeshes).
There is no 'best' tile size, but common values are around 64 to 256.
Pressing scan now should give you something like this: (you can compare your settings to mine)
It is often nice to have 'Show Outline' and 'Show Surface' enabled in the recast graph settings.
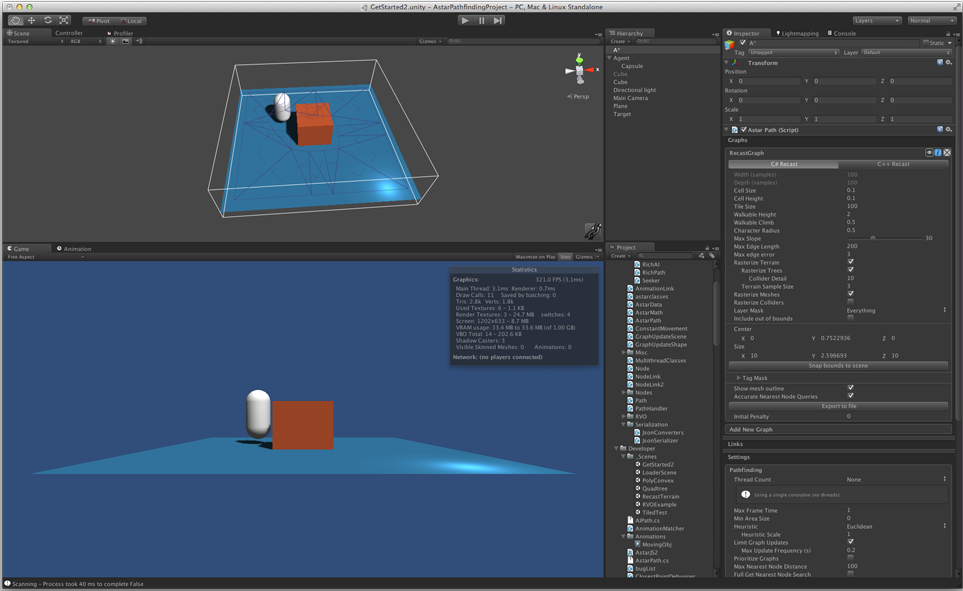
Almost everything looks good. The only problem is that our character has also been included in the navmesh, we don't want that (since the character will move around, it is not static). So we place the character in a separate layer (e.g Transparent FX) and then we configure the Layer Mask field on the recast graph to exclude that layer in navmesh generation.
Pressing play should now give you a scanned graph and the character should move to the target.
The resolution of the recast graph (the width/depth fields in the inspector) have a large effect on how the generated navmesh looks. The image below shows the same environment, but with different resolution for the voxelization. Note that the thin region between the cubes is only walkable when a high enough resolution was set.

Here is another example: 
Rasterization resolution has a great effect on the time it takes to generate a recast graph, but it has no direct impact on the runtime performance of it (except of course, full graph updates). Indirectly it can affect it slightly since a large resolution can add more detail to the graph.
As recast graphs for larger worlds can take quite some time to scan. You may want to cache the result to improve startup times.
The tutorial continues on the page Using navmeshes.