|
A* Pathfinding Project
4.1.2
The A* Pathfinding Project for Unity 3D
|
|
A* Pathfinding Project
4.1.2
The A* Pathfinding Project for Unity 3D
|
Turn-based games often require more detailed control over which nodes that units can traverse as well as the cost for traversing those nodes, which may vary between units. On the other hand maximum pathfinding performance is not always needed since most units will be stationary at any one time.
It is possible to update all movement costs and similar attributes for nodes in the graph before every path request however this is not a particularly clean solution so this package provides some other ways to do this.
If you need even more control you can take a look at the ITraversalProvider section.
The most common scenario is that one wants to block certain nodes from being traversed by some units but not by others. For example in a turn based game one usually want to prevent units from standing on the same tile, however a unit should obviously not be blocked by itself.
For this purpose the BlockManager component and the accompanying SingleNodeBlocker component exist. The SingleNodeBlocker is intended to be used as an easy way of blocking specific nodes where each SingleNodeBlocker component blocks exactly one node. The BlockManager component will keep track of all the SingleNodeBlocker components and allows the creation of TraversalProvider instances which can be used in paths to specify additional nodes that are blocked.
In this tutorial we will create a new scene and a few scripts to test the API.
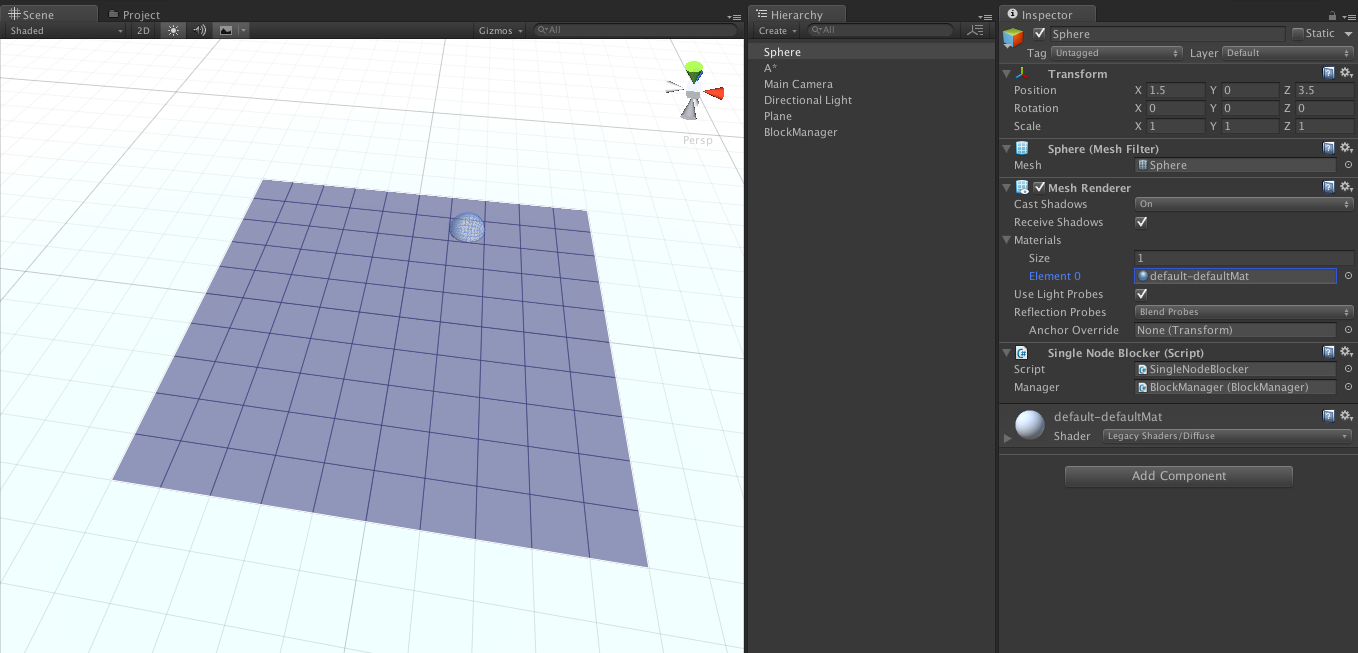
Create a new scene and save it in your project, name it "TurnBasedTest" or whatever you feel like. Add a new GameObject and name it "BlockManager" then select it and attach the BlockManager component to it.
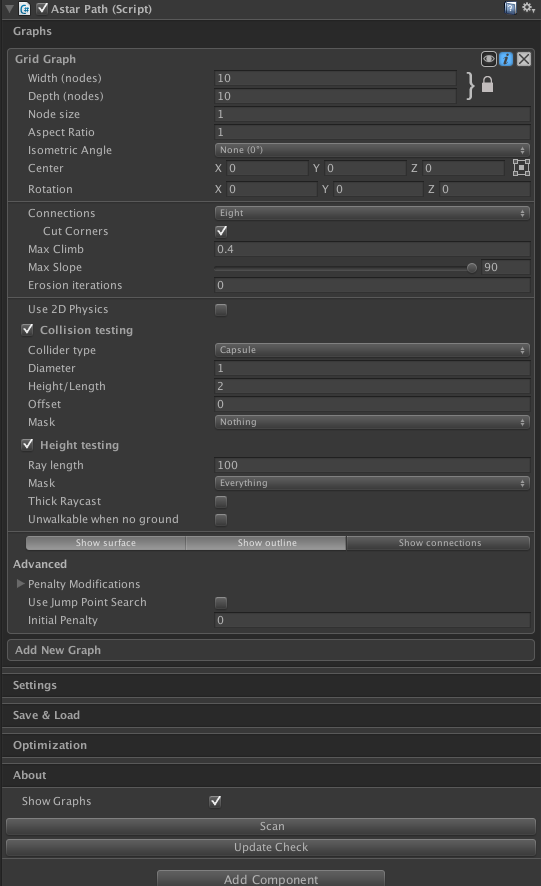
Now add a sphere and place it at (1.5, 0, 2.5). This will put it right in the center of a node. Add the SingleNodeBlocker script to it and assign the BlockManager component we created earlier to the "manager" field on the SingleNodeBlocker component. Make sure you delete the collider on the sphere because otherwise the sphere will be detected as an obstacle anyway and we want to use the SingleNodeBlocker for that. Create another GameObject and name it "A*", then add the AstarPath component to it (Menu bar -> Pathfinding -> Pathfinder). You can add a large plane to the scene if you want, just to have something to have as a ground plane. Add a Grid Graph to the AstarPath component and set the "Unwalkable when no ground" setting to false. If you click the Scan button now you should see a small empty grid with a single sphere. Note that the sphere does NOT block any node in the graph by itself.
Now we want that SingleNodeBlocker to actually block some position, so create a new C# script named "BlockerTest.cs" and add this code:
Add that new script to the sphere that we created earlier. When the game starts, that script make the SingleNodeBlocker component tell the BlockManager that it now occupies the node at that object's position. This is not enough however because no path knows that a node has been blocked yet.
To actually calculate a path we will create a new script called "BlockerPathTest.cs" which should contain this code:
This script will calculate a path every frame from its own position to the target's position while using a TraversalProvider that was created to make the path avoid any obstacles in the specified list.
The BlockManager.TraversalProvider has 2 modes. AllExceptSelector and OnlySelector. If the AllExceptSelector mode is set then all nodes blocked by SingleNodeBlocker components will be treated as unwalkable except those in the specified list. This is useful if you for example want a unit to avoid all units except itself, or maybe you want it to avoid all units on its own team but no opponents. When the OnlySelector is set then all nodes which are blocked by SingleNodeBlockers in the list will be treated as unwalkable. For performance reasons it is a good idea to keep the selector list relatively small.
Create a new GameObject with the name "Target" and position it at for example (3.5, 0, 3.5). Also create a GameObject named "Path Searcher" and add the new BlockerPathTest component to it. Move the object to the position (-2.5, 0, 3.5) and assign the "Block Manager" and "Target" fields. Now press play, you should see a red line that goes from the "Path Searcher" to the "Target". Note that it passes through the sphere as if it was not there. This is because we haven't added it to the "Obstacles" list on the searcher.
If you stop the game and then add the sphere's SingleNodeBlocker component to the list and press play again you should see that it is now being avoided.
Now we could expand this easily to for example create a number of red spheres and a number of blue spheres and make two searchers where one considers just the blue spheres as obstacles and one considers just the red spheres as obstacles. You can see this in the video below.
The above system works for simple cases and is pretty easy to use. However for more complicated cases it is better to use the ITraversalProvider interface. Any path can be assigned a traversalProvider which has two methods
The CanTraverse method should just return true or false depending on if the unit should be able to traverse that node. The GetTraversalCost method should return the additional cost for traversing that node. By default if no tags or penalties are used then the traversal cost is zero. A cost of 1000 corresponds roughly to the cost of moving 1 world unit.
As a reference, the default implementation would be
By implementing a custom ITraversalProvider you can change the penalties however you want to suit your game's rules. Note that the grid graph for performance reasons removes all connections to unwalkable nodes, so even if you would remove the "node.Walkable &&" part in the traversal provider a path on grid graphs would still not traverse unwalkable nodes. You can only make nodes unwalkable, not make unwalkable nodes walkable again.
When you have implemented an ITraversalProvider you can assign it to a path like was done above.
 1.8.2
1.8.2 
