Navmesh Cutting
Tutorial on navmesh cutting.

Navmesh cutting is used to cut holes into an existing navmesh generated by a recast or navmesh graph. Recast/navmesh graphs usually only allow either just changing parameters on existing nodes (e.g make a whole triangle unwalkable) which is not very flexible or recalculate a whole tile which is pretty slow. With navmesh cutting you can remove (cut) parts of the navmesh that is blocked by obstacles such as a new building in an RTS game however you cannot add anything new to the navmesh or change the positions of the nodes. This is significantly faster than recalculating whole tiles from scratch in a recast graph.

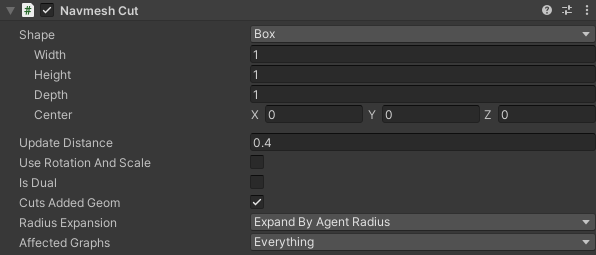
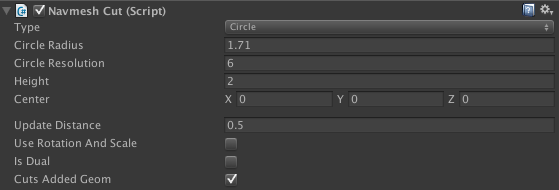
The NavmeshCut component uses a 2D shape to cut the navmesh with. This shape can be produced by either one of the built-in 2D shapes (rectangle/circle) or one of the 3D shapes (cube/sphere/capsule) which will be projected down to a 2D shape when cutting happens. You can also specify a custom 2D mesh to use as a cut.

Note that the rectangle/circle shapes are not 3D. If you rotate them, you will see that the 2D shape will be rotated and then just projected down on the XZ plane. Therefore it is recommended to use the 3D shapes (cube/sphere/capsule) in most cases since those are easier to use.
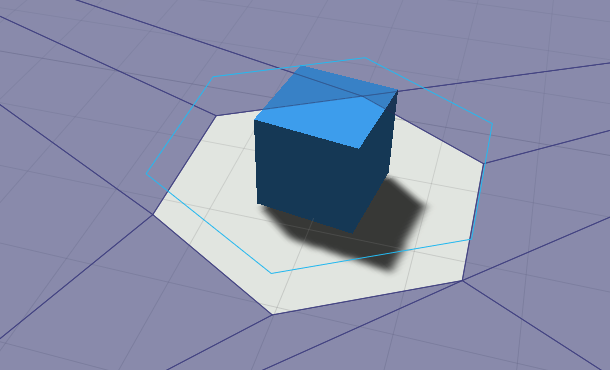
In the scene view the NavmeshCut looks like an extruded 2D shape because a navmesh cut also has a height. It will only cut the part of the navmesh which it touches. For performance reasons it only checks the bounding boxes of the triangles in the navmesh, so it may cut triangles whoose bounding boxes it intersects even if the triangle does not intersect the extruded shape. However in most cases this does not make a large difference.
It is also possible to set the navmesh cut to dual mode by setting the isDual field to true. This will prevent it from cutting a hole in the navmesh and it will instead just split the navmesh along the border but keep both the interior and the exterior. This can be useful if you for example want to change the penalty of some region which does not neatly line up with the navmesh triangles. It is often combined with the GraphUpdateScene component (however note that the GraphUpdateScene component will not automatically reapply the penalty if the graph is updated again).
By default the navmesh cut does not take rotation or scaling into account. If you want to do that, you can set the useRotationAndScale field to true.
Custom meshes
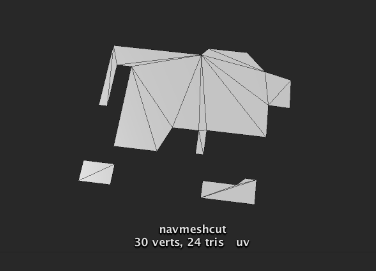
For most purposes you can use the built-in shapes, however in some cases a custom cutting mesh may be useful. The custom mesh should be a flat 2D shape like in the image below. The script will then find the contour of that mesh and use that shape as the cut. Make sure that all normals are smooth and that the mesh contains no UV information. Otherwise Unity might split a vertex and then the script will not find the correct contour. You should not use a very high polygon mesh since that will create a lot of nodes in the navmesh graph and slow down pathfinding because of that. For very high polygon meshes it might even cause more suboptimal paths to be generated if it causes many thin triangles to be added to the navmesh. 
Update frequency
Navmesh cuts are typically pretty fast, so you may be tempted to make them update the navmesh very often (once every few frames perhaps), just because you can spare the CPU power. However, updating the navmesh too often can also have consequences for agents that are following paths on the graph.
If a navmesh cut updates the graph near an agent, it will usually have to recalculate its path. If this happens too often, this can lead to the pathfinding worker threads being overwhelmed by pathfinding requests, causing higher latency for individual pathfinding requests. This can, in turn, make agents less responsive.
So it's recommended to keep the update frequency reasonable. After all, a player is unlikely to notice if the navmesh was updated 20 times per second or 2 times per second (or even less often).
You can primarily control this using the updateDistance and updateRotationDistance fields. But you can also control the global frequency of updates. This is explained in the next section.
Control updates through code
Navmesh cuts are applied periodically, but sometimes you may want to ensure the graph is up to date right now. Then you can use the following code. // Schedule pending updates to be done as soon as the pathfinding threads You can also control how often the scripts check for if any navmesh cut has changed. If you have a very large number of cuts it may be good for performance to not check it as often.
// are done with what they are currently doing.
AstarPath.active.navmeshUpdates.ForceUpdate();
// Block until the updates have finished
AstarPath.active.FlushGraphUpdates();// Check every frame (the default) You can also find this setting in the AstarPath inspector under Settings.
AstarPath.active.navmeshUpdates.updateInterval = 0;
// Check every 0.1 seconds
AstarPath.active.navmeshUpdates.updateInterval = 0.1f;
// Never check for changes
AstarPath.active.navmeshUpdates.updateInterval = -1;
// You will have to schedule updates manually using
AstarPath.active.navmeshUpdates.ForceUpdate();
Navmesh cutting and tags/penalties
Navmesh cuts can only preserve tags for updates which happen when the graph is first scanned, or when a recast graph tile is recalculated from scratch.
This means that any tags that you apply dynamically using e.g. a GraphUpdateScene component may be lost when a navmesh cut is applied. If you need to combine tags and navmesh cutting, it is therefore strongly recommended to use the RecastMeshObj component to apply the tags, as that will work smoothly with navmesh cutting.
Internally, what happens is that when a graph is scanned, the navmesh cutting subsystem will take a snapshot of all triangles in the graph, including tags. This data will then be referenced every time cutting happens and the tags from the snapshot will be copied to the new triangles after cutting has taken place.
You can also apply tags and penalties using a graph update after cutting has taken place. For example by subclassing a navmesh cut and overriding the UsedForCut method. However, it is recommended to use the RecastMeshObj as mentioned before, as this is a more robust solution.
A* Pro Feature:
This is an A* Pathfinding Project Pro feature only. This function/class/variable might not exist in the Free version of the A* Pathfinding Project or the functionality might be limited.
The Pro version can be bought here