|
A* Pathfinding Project
3.8.5
The A* Pathfinding Project for Unity 3D
|
|
A* Pathfinding Project
3.8.5
The A* Pathfinding Project for Unity 3D
|
How to use the local avoidance in the A* Pathfinding Project.
The local avoidance included in the A* Pathfinding Project is based on RVO: Reciprocal Velocity Obstacles. The implementation is sampling based and uses gradient descent to find the optimal velocity.
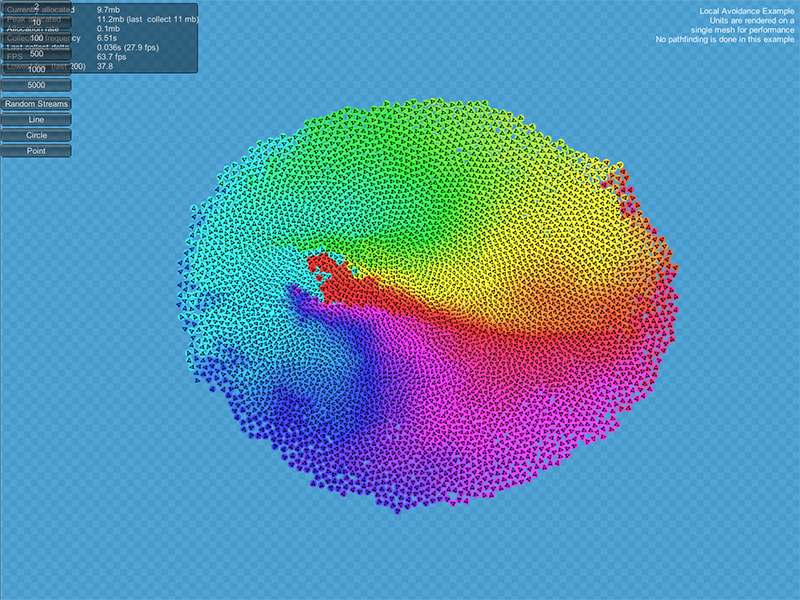
So how fast is this system then, you might wonder. It is very high performance. Especially if you take into account the fact that a local avoidance simulation does not need to run at a very high fps, that's just a waste of CPU cycles because the quality won't improve much. I have been able to simulate 5000 agents at a good fps on my computer (i7 processor). The local avoidance simulation ran at about 10 fps and the game ran at 50-100 fps mostly, with a lowest fps of around 30-40. The visualization for this simulation was done simply by creating a mesh which held one quad for each agent. The reason for this is that at such high numbers, creating a GameObject for every agent is really slow, just creating that many game objects took something like 10 seconds when I tested. The agents were setup in a circle and trying to reach their antipodal points. So it was basically as crowded as it can get.
However do not count on having this high number of agents in your game. These examples were very lightweight and in a game there is usually lots of overhead from many other things.
See below for a screenshot of the mentioned stress test:
For this reason, that Unity can be a limiting factor, the system is divided into two parts. First there is the core simulation code. It is completely independent of Unity specific objects such as GameObjects and MonoBehaviours. The only really Unity specific classes it uses are math classes which are easily interchangeable. This core handles all simulation of rvo (local avoidance) agents.
The second part is the Unity interface. Many of those classes are just wrappers for the corresponding core classes. The RVOSimulator class is for example just a wrapper class for the Pathfinding.RVO.Simulator class. The Unity interface also contains helper classes for much easier local avoidance integration. One of those is the RVOController which you will probably use quite a lot. It is written to be similar to the Unity Character Controller, supporting functions such as Move and has properties such as velocity which you can easily access.
All of the scripts in the Unity interface part share common assumptions on how the scene should be set up: There should always be one (1) RVOSimulator in the scene, other scripts will look for it and get the core simulator instance it is a wrapper for. You can simply add it to any GameObject, edit the few settings if you want and it will work. You should never have more than one, all scripts which look for it use FindObjectOfType and there is no easy way to control exactly which of the multiple RVOSimulators it will return, so keep it to one for simplicity's sake.
There are two example scenes included which show how the local avoidance system works. You can find them in Assets/AstarPathfindingProject/ExampleScenes/Example11_RVO.
Ok, you now know sort of how it is structured, let's build a small concrete example so you can see how it works.
Start by creating a new scene, add a large plane as a ground (position (0,0,0), scale (10,10,10)). Then add a new GameObject, name it "Simulator". Now add the component RVOSimulator, you can find it in Components -> Local Avoidance -> RVO Simulator. You can see that it has a few options, but you can leave them at the default setting for now. However I recommend that you read the class documentation for the RVOSimulator later since the performance is very dependent on those few settings. This component will handle the simulation of our agents as well as storing any dynamic obstacles we add (more about those later).
Now we want an AI to walk around. It will be a very simple AI, it will basically walk forward. So first add a new Cylinder to the scene (GameObject -> Create Other -> Cylinder). It will create a cylinder with a height of 2 units somewhere in the scene, place it somewhere visible above the ground plane we added before. Add to this GameObject the component RVOController, you can find it at Components -> Local Avoidance -> RVO Controller. This component is designed to be an almost drop-in replacement for the Unity Character Controller, so if you have used the character controller, you will feel at home with this one. It does not, for obvious reasons support some collision specific things, like collision flags but it is very similar. Since our cylinder is 2 units high, set the height variable on the RVOController to 2.
Now that we have our AI standing on the ground, we want to tell it to do something: so fire up your favorite text editor and create a script called SimpleRVOAI.cs. This is what it should contain:
It does't take an expert coder to see what that does. We simply get the RVOController during Awake and every frame we set the desired velocity to 10 meters per second in the forward direction, as simple as that. If you add this script to your cylinder and press play, it should move forward at a steady speed.
Note that the RVOController does not handle movement by itself. Some games might want to use a CharacterController as well, some might want to use transform.Translate and some might want to use a Rigidbody, so it is up to the movement script to actually move the character based on the velocity that the RVOController calculates.
Now for the fun part. Duplicate the cylinder and place it some distance in front of the first one, then rotate it so that they are facing each other. Press play. The cylinders should move towards each other, and just before collision, avoid each other! Ain't that awesome!
The included AI scripts (AIPath, RichAI) support the RVOController out of the box, simply add the RVOController to a GameObject with an AIPath or RichAI component and make sure it has no other movement components (rigidbody or charactercontroller) and it will detect the RVOController.
The AILerp movement script is designed to interpolate along the path and follow it exactly, therefore makes no sense for it to deviate from the path and thus it does not support local avoidance.
Obstacles, dynamic and static can be added to the simulation. This first part will discuss navmeshes and the second part will discuss obstacles more generally.
If you are using a navmesh based graph, it is very likely that you want your agents to not go outside, and perhaps even avoid the border of the graph. Fortunately for you, there is a simple script written just to do just that. It is called RVONavmesh and can be found at Components -> Local Avoidance -> RVO Navmesh. Add that to any GameObject in your scene and it will, when a graph is scanned or loaded add it's border as an RVO obstacle.
Obstacles can be added to the simulation. The agents will not be able to pass through them (unless moving at very high speed relative to fps) and agents can also avoid them using local avoidance.
A few built-in colliders can be found in Components -> Local Avoidance. If you want to write custom colliders, take a look at the page for doing so (Writing RVO Colliders).
The build-in colliders can be moved around however you want and they will be updated appropriately. But just because they can be moved around it doesn't mean they can be used to push agents around. In fact, they are quite bad at it. As long as they move very slowly, it works, but if they move too fast, the agents can get stuck inside.
The one variable the colliders have in common is the Obstacle Mode field. The internal workings for it is explained in the Writing RVO Colliders tutorial, but it is pretty basic. KeepOut will block agents from moving into the obstacle, but not from moving out from it when they are inside, KeepIn will do the opposite.
See also the subpages for more in-depth information:
 1.8.2
1.8.2 
